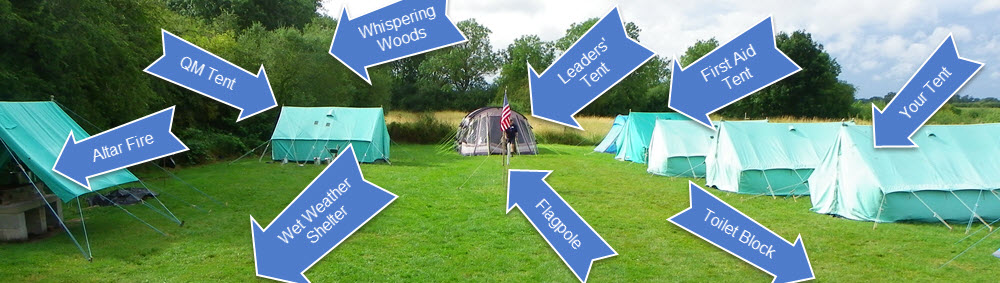
Each stage of the mystery has puzzles to solve, camp activities to do, and some information about Guide Camp. To explore the mystery, use the options that appear towards the bottom of the page.
Solve the Mystery
Your current location is: Altar Fire
Remembering that you are Fire Patrol this morning, you need to lay and light a fire.
You gather together all the items you need to lay a fire:
- Water bucket filled with water. This is not to put the fire out, but to use if someone burns themselves when they would put the burn in cold water for a least 10 minutes.
- Punk (a small handful): dried holly leaves, bark or pinecones, which light easily and burn hot, but only for a short time.
- Kindling (a handful): very thin dry twigs (ideally not much thicker than a matchstick), these burn easily so help the fire to catch.
- Sticks (at least 7 to start with): Ideally a range of thicknesses from twigs upwards, with a good supply nearby. These take a bit more heat to burn but still catch fire easily and burn for a little longer creating more heat.
- Logs (2 to build the fire): used to build the structure of the fire. If you need to fire to burn for longer you need more logs as these are the fuel which cooks your dinner.
You carefully build the structure of the fire (see the Camp Activity below for details), ready to light it.
But what about matches? You notice some matchboxes left on the ground, but of course they are damp, so they won’t be any good.
Well remembered, you picked up the box with the Steam Train on it – these matches are nice and dry. You strike a match and hold it to the punk. It catches alight, then so does the kindling and then the sticks. You soon have a nice little fire going.
As you watch the flames you remember the Lemony piece of paper from the First Aid tent that said ‘Heat me up’. Once the flames have died down, you get it out and place it on the hot bricks next to the fire. Amazingly the following numbers appear: it was a message written in invisible ink.
311523
Maybe these numbers will be useful somewhere else.
Camp@Home Activity
Write your own secret message using lemon juice. Once it has dried, if you iron the paper the message should appear.
Camp@Home Activity

Practice building a fire, but DON’T LIGHT IT WITHOUT PERMISSION from an adult!
Preparation
Firstly, gather the items you need to light a fire, as listed above. You can do this by exploring your garden or by collecting similar shaped items (inside or outside) for a ‘pretend’ fire (perhaps on a smaller scale). Most leaves are no good for lighting fires as they just smoke rather than burning hot, but you could use them to practice.
We practice with chocolate campfires at Guides, using Matchmakers, chocolate fingers and Swiss Rolls for the kindling, sticks and logs, with chocolate corn flakes for the holly leaves, not forgetting a cup of lemonade for the fire bucket! Perhaps you could try that instead?
Find a safe place to build your fire. It’s important there are no plants or other combustible materials nearby which could catch fire: bare earth or bare brick is best, but remember that the fire will leave ash and scorch marks. At home, we sometimes stand an aluminium dustbin lid on some bricks (so it’s off the ground) and light our fire in that.
Construction
We are going to make what looks like a little shelter with an open side, like the one shown in the picture above.
Place your two logs about 15cm apart so that the wind blows between them. If you’re not sure which way the wind is blowing, lick a finger and hold it up: the side which is coldest is where the wind is coming from. We want the wind to blow into the open side of our shelter.
Place one of your sticks across the top of the logs to make a ‘bridge’ at the end the wind is coming from.
Place your punk in a compact heap between the logs, just in from the ‘bridge’ – keep it bunched together as much as possible.
Lean your kindling against the ‘bridge’ so the sticks are close to the pile of punk (ideally just touching it). If there is too much space between them, push the punk closer to the kindling (you could use smaller logs – or turning them might make the structure lower).
Then put your sticks on top of the kindling.
The idea is that the match lights the punk, which sets light to the kindling, which sets light to the sticks (which set light to more logs for a bigger longer lasting fire). For this to happen they all need to be close to each other.
Lighting it – with permission only!
If you were going to light it, you would strike a match near the open side of the ‘shelter’, and reach under the ‘bridge’ to light the punk.
As flames start to come up through the twigs (as shown in the photo), you would add more sticks on top of the flames. When doing this, always hold the stick by the end, keep your hand low, place the stick on the fire carefully (don’t drop it on), and DON’T put your hand over the flames!
About Guide Camp
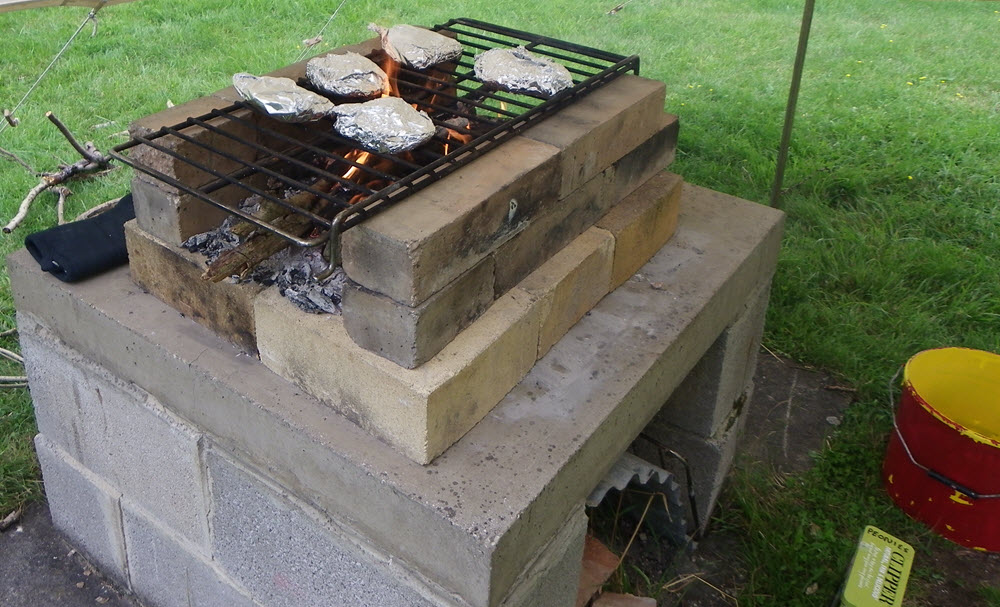
The altar fire is where we do most of the cooking on camp. The ashes are cleared every morning and a fire laid and lit for cooking and heating water.
Every meal takes a lot of teamwork between Fire Patrol (keeping the fire at the right temperature), Orderly Patrol (preparing the food for cooking and delivering it to the cooking area) and Cooks’ Patrol (taking turns to do the cooking on the fire).
At camp, fires are generally only allowed on altar fires (off the ground) or in the campfire circle. Altar fires often have lines of bricks on each side. These prevent burning sticks from falling out of the fire, and support the grid that the pans stand on.